This is a tutorial to create an addition to Firefox’s search bar (that thing in the upper right hand corner) with any search box. This would be really useful for a library- give users easy access to your collection.
Step 1: Generate Code
The first step here is to generate the code needed to add the search box. This can be accomplished by writing the code yourself, (instructions are here), but this tutorial is meant for anyone to be able to do it. (including me)
My approach was to have a program generate the code for me. To do that, install the “Add to Search Bar” extension located here:
https://addons.mozilla.org/firefox/3682/
Then restart firefox. This extension enables you to right click ANY search field and choose “add to search bar.” This is a handy feature, built into Opera, and nice to have in Firefox.
OK, now go to the page you want to enable a firefox search box for. I’m using my page as an example, but it could be any page.
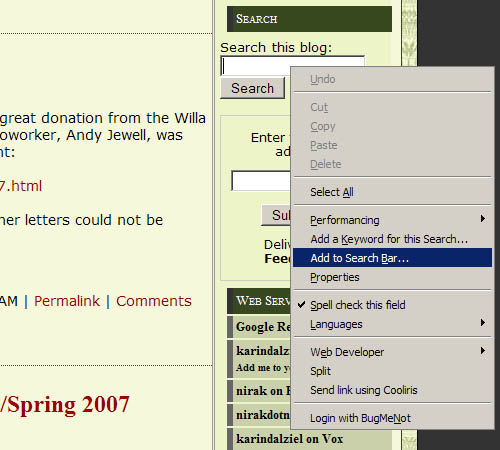
Right Click in the search box and choose “add to search box” and click ok
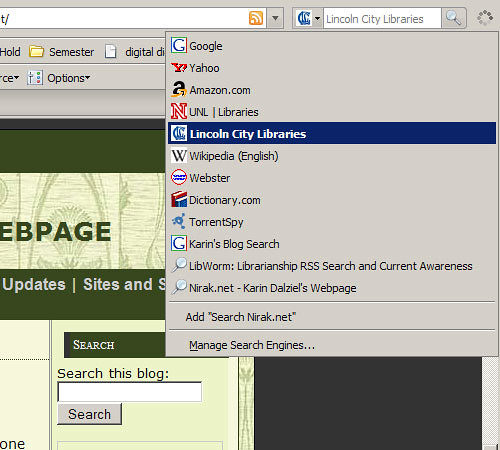
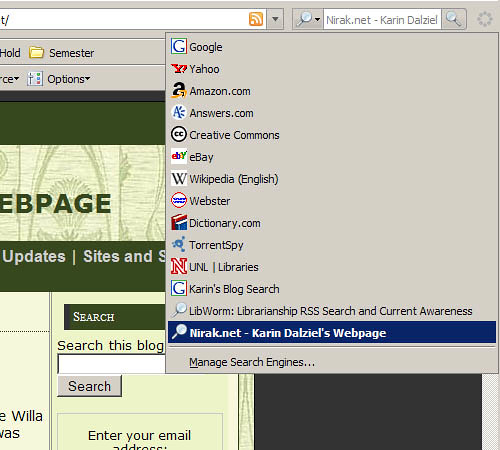
After you do this, your search will show up in the list of Search Box choices:
Step Two: Upload Code to web server
What you have just done is to create a text file inside Firefox’s application folder with your search. You can find this by going to:
C:\Documents and Settings\YourUserName\Application Data\Mozilla\Firefox\Profiles\ght6klyu.default\searchplugins
(note that ght6klyu.default is a random string, yours will be different. This is not my real random string. Also note that this location is slightly different if you have firefox installed as a portable application)
In order to see all the folders, you will probably need to enable hidden folders in Windows. do this by going to Start>Control Panel>Folder Options. Click on the tab “View” and under “Hidden files and folders” choose “Show hidden files and folders.”
OK, now you should have access to your “searchplugins” folder. You will find text files for all the searches you have added. In my example, my text file is called “niraknet—karin-dalziels-webpage.xml”
Upload this file somewhere on your webserver. I created a folder called “plugins” in the main directory.
Step 3: enable Firefox auto-discovery
The next step is to make this search plugin available to your users.
You want to add a bit of code to whatever page your user will download the plugin from that tells firefox it’s there. This page explains the process:
But basically you are going to add this bit of code to the head element of your web page, (somewhere between the <head> and </head> but not between any other element pairs) replacing pluginURL with the path to your file and replacing searchTitle with the title of your search.
<link rel=”search” type=”application/opensearchdescription+xml” title=”searchTitle” href=”pluginURL”>
So mine would look like this:
<link rel=”search” type=”application/opensearchdescription+xml” title=”Search Nirak.net” href=”/plugins/niraknet—karin-dalziels-webpage.xml”>
Once you are done, your user will be able to click on the search bar icon and add your website to their searches
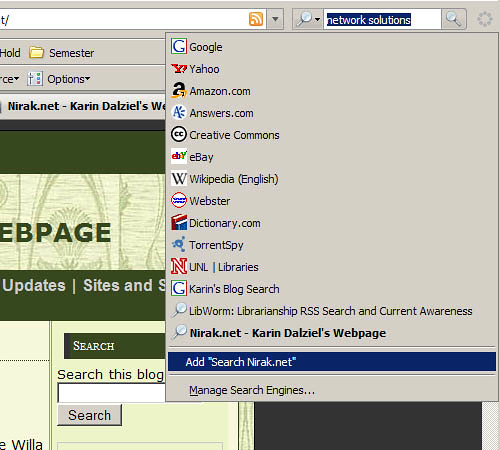
You can even have multiple searches available- say, one for a title search, one for a keyword search, etc.
I added UNL’s library and the local city library to my search bar (using the Firefox plugin), and it’s great!