
It all started with simply wanting to take better photos. I bought a Canon t3i this year, and have been using it fairly frequently, but still felt I was fumbling with the controls more often than not. I’m not a photography newbie; I have been taking pictures with a film SLR camera since high school, and have taken half a dozen photography courses all told. But all the courses I took were in film photography, and there was something fundamental I wasn’t getting in digital.
I was also driven by the desire to spend less time on the computer fixing things I should have gotten right when taking the picture. I may have been a little naive.
This will hopefully be a series of blog posts about what I have learned about digital photo making.
So, first up: White balance!
In film photography, white balance as such wasn’t such a big deal. You picked a film for a type of light, and then you might use a slightly warm or cool filter if the light you were shooting under didn’t match the type of film. In general, the mismatch is one of the things that gives film it’s “look.” The instagram app has a bunch of filters you can apply that are meant to mimic different camera and film pairings, and usually one of the most noticeable changes is the photo will get warmer or cooler.
I knew the basics of white balance when I started: where “daylight” was on the continuum, what was considered warm, what was considered cool. I knew the basics of color theory from art school. My first idea was I would start using the auto white balance feature of my camera for aesthetically pleasing effects. But how did it work? What was changing when I set the white balance?
My first little experiment was to take a few pictures of my garden with the reddish cedar mulch as the “white balance.”

I liked the result, so I took some more test pictures. I then hit upon the idea to make some ready made cards so I could set a custom white balance of my choice – making images look warm or cool even when the light wasn’t obliging. (This concept isn’t new, as I found out when I searched and hit upon warm cards, meant for digital filmmaking.)
So, I (badly) painted up some cards with different colors, and used them to set the white balance on a still life. At this point, I was wishing I had one of those fancy cameras that let me set the white balance by Kelvin number. (I found out later I can download a firmware called Magic Lantern to do this, but I have not been brave enough to try it on my camera yet.)
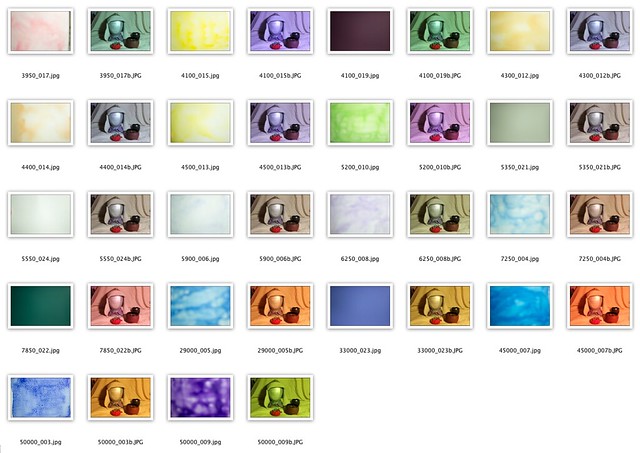
Then, I arranged all the resulting pictures by kelvin number, thinking I would get a nice gradient:
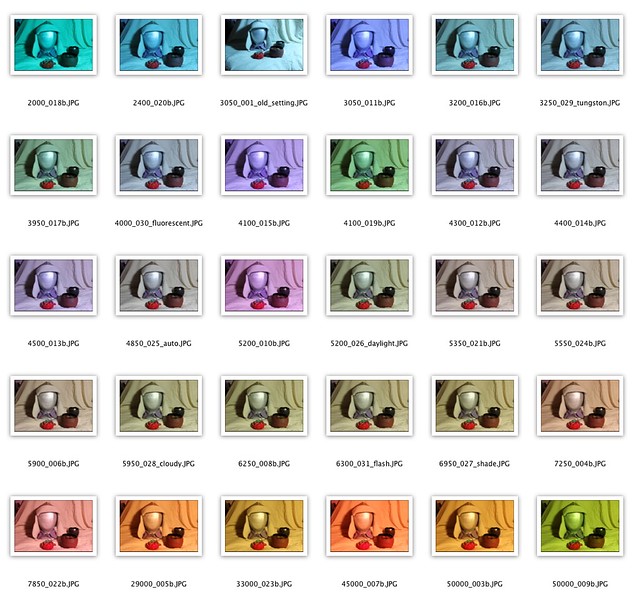
I was surprised when some of the pictures with the same kelvin numbers were completely different:
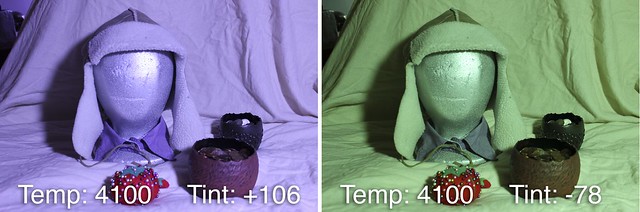
This is because the camera sets the tint as well as the temp, and there doesn’t seem to be any way to change this. A little research led me to this page where I learned that the temperature is a blue/yellow setting and the tint is a green/magenta setting. I can alter the tint in camera by using the white balance shift setting, but that just shifts it from where the camera decides it should be. So, my dreams of getting reproducible results based on setting the kelvin number were somewhat dashed.
At this point, I also started to wonder about the different types of light on my pictures. The above pictures were taken with some cheap “daylight” bulbs, but the effect wasn’t really all that close to any daylight I’d ever experienced. That research is for another post, though, as I’m waiting for some supplies to come in for my experiments.